Setup Zephyr OS for STM32 Nucleo
A few month ago I get a free STM32 Nucleo board from ST Microelectronics at Nuremberg's Embedded World. I was thinking about buying one but didn't have any excuse to do it. As I got one I started to look on one of the real-time OS which catch my attention a long time ago - Zephyr OS.
After a first look it appeared to me as nicely design OS with rapidly growing number of features. The other thing which I noticed is that the list of supported boards is enormously big, it can come handy in the future. Moreover, it is under intense development by the Intel corporation which means that it won't die in a few years (I hope 😀).
In this note I will describe process of setting up development environment for STM32 Nucleo (particularly for STM32L010RB) board with Zephyr OS. Later I would like to add testing setup too.
Environment setup
Firstly, install dependencies:
$ sudo apt install --no-install-recommends git cmake ninja-build gperf \
    ccache dfu-util device-tree-compiler wget \
    python3-pip python3-setuptools python3-tk python3-wheel xz-utils file \
    make gcc gcc-multilib g++-multilib libsdl2-dev
Note: Commonly used notation for shell commands is $ - commands executed
by normal user and # commands executed as root
Then, install Zephyr's west tool. It is basically Python utility to help you
manage source codes and configuration of your repositories. To install it use
pip (Python's package manager):
$ pip3 install --user west
$ echo 'export PATH=~/.local/bin:"$PATH"' >> ~/.bashrc
$ source ~/.bashrc
Now we can get zephyr source code (it will take sometime ~ 300 Mb):
$ west init stm-testbed
Next update all submodules and install all the required python packages:
$ cd stm-testbed
$ west update
$ pip3 install --user -r zephyr/scripts/requirements.txt
Lastly, we need to setup the zephyr-SDK (compilers and tools to build Zephyr).
$ wget https://github.com/zephyrproject-rtos/sdk-ng/releases/download/v0.11.1/zephyr-sdk-0.11.1-setup.run
$ sh zephyr-sdk-0.10.0-setup.run
The script will guide you through the installation process. The last thing to do is to define two environment variables which will be later used by the Zephyr's build system
$ export ZEPHYR_TOOLCHAIN_VARIANT=zephyr
$ export ZEPHYR_SDK_INSTALL_DIR=<sdk installation directory>
I also added them to my ~/.bashrc to not export them every time. I forgot to
do it a few times and spend too much time looking for such a simple problem.
Zephyr OS in QEMU simulation
Zephyr is ready for compilation. The developers thought about further application development and testing so they added support of Qemu as default build target. Therefore, if you have Qemu installed you can immediately start to play with the system API.
Firstly, before building an application, we need to configure environment for
the Zephyr. Luckily, it is simple - just source the zephyr-env.sh
script:
$ cd stm-testbed/zephyr
$ source zephyr-env.sh
Next, let's run provided hello_world application. Go to the following
directory and create build directory:
$ cd samples/hello_world/
$ mkdir build && cd build
Now we will use cmake to prepare application for build (create cmake cache
file). As we want to run application in Qemu we need to tell cmake about it
with defining variable BOARD (with -D flag):
$ cmake -GNinja -DBOARD=qemu_x86 ..
The -GNunja arguments tells cmake that later we will build our application
with Ninja building system. The last .. is just path to the upper
directory. Then, build and run it with ninja:
$ ninja
$ ninja run
You should see something similar:
SeaBIOS (version rel-1.12.0-0-ga698c8995f-prebuilt.qemu.org)
Booting from ROM..***** Booting Zephyr OS zephyr-v1.14.0-783-g021e27cfed46 *****
Hello World! qemu_x86
The last line is our application. Hurray!
Note: To exit from Qemu press CTRL + A and then X
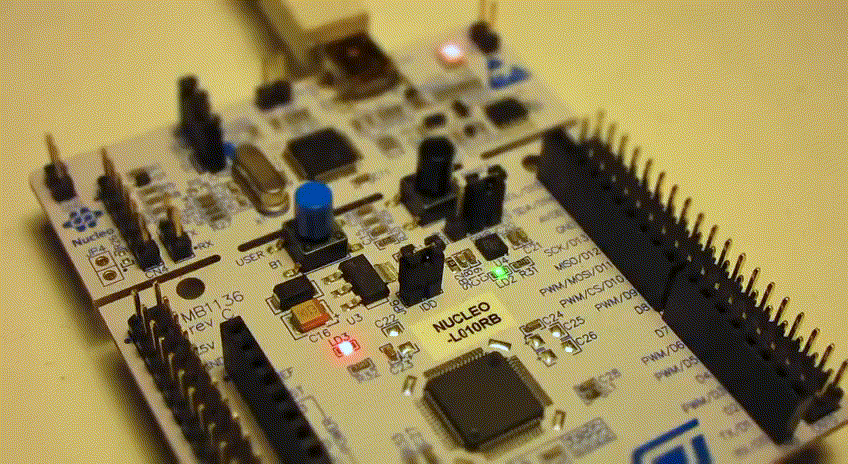
Compiling and running "Hello World" example
Now let's try it on the real hardware. Clean the build directory and re-generate cmake cache for your STM32 board.
$ ninja clean
$ cmake -GNinja -DBOARD=nucleo_l073rz ..
Connect your board to the PC and check that it appeard in the /dev directory
(mine is /dev/ttyACM0). Compile and flash application to the board:
$ ninja
$ ninja flash
Run some serial monitor at /dev/ttyACM0, 115200 8N1 to check if firmware was
correctly uploaded. I use minicom:
$ sudo minicom -s
Press reset button on the DevKit and you should see similar message:
***** Booting Zephyr OS zephyr-v1.14.0-783-g021e27cfed46 *****
Hello World! nucleo_l073rz
Creating application for Zephyr OS
In Zephyr world the build system is application-centric. That means that your application is entry point in the build process. That, in turn, means that you can control the way Zephyr OS is build from your application building process.
Zephyr is installed separately somewhere in the system. So, you use it as a library. I suppose that they choose this way to simplify the process of configuration management and building of the kernel.
As an examples let's create simple application based on blinky example. First of
all create working directory and cmake's project file:
$ mkdir app && cd app
$ mkdir src
$ touch CMakeLists.txt
Put the following configuration into the CMakeList.txt:
# Boilerplate code, which pulls in the Zephyr build system.
cmake_minimum_required(VERSION 3.13.1)
include($ENV{ZEPHYR_BASE}/cmake/app/boilerplate.cmake NO_POLICY_SCOPE)
project(my_zephyr_app)

# Add your source file to the "app" target. This must come after
# the boilerplate code, which defines the target.
target_sources(app PRIVATE src/main.c)
Then copy source code of provided blinky example. Go back to the zephyr
folder and then take samples/basic/blinky/src/main.c and copy main.c.
Now connect your board and run ninja flash. It should compile and upload
application, built-in LED will start blinking.
As you can see it is quite convenient to manage your application as it is completely separate from source code of the OS.
Update - Use official getting started
In the time when I started writing this article the official getting started was a little bit hard to follow. However, now it is so concise and simple that I would recommend to follow official documentation.
